Next I explain with a small tutorial, how to control a brushless motor with a variable speed drive (ESC) and an Arduino board.
In my case, I use an ArduPilotMega board, but this works for all the Arduino flavour boards.
What we need?
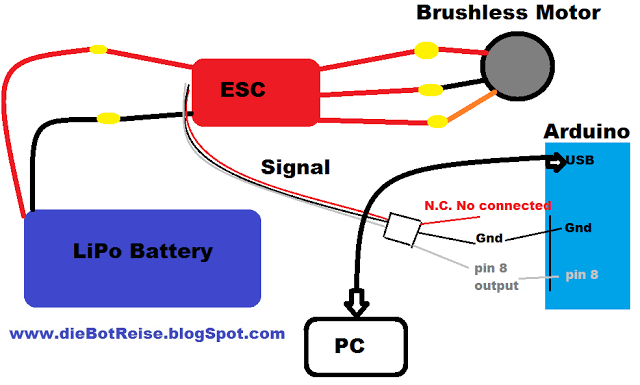
We need a LiPo battery, an ESC, a Brushless motor and an Arduino. A regular voltage source can not be used, because it normally does not have enough capacity (or power) to start up the motor.


Connections
Connect the test bench as follows:
How does it work?
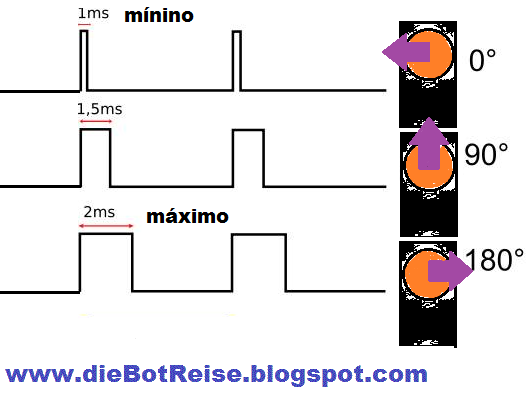
To control such a motor, you have to send signals to the ESC as if you wanted to control a normal servo motor. These signals are square with a high time that varies between 1 and 2 milliseconds, which would correspond to an angle of between 0 and 180 degrees. We can try first with a servo: If a servo doesn’t move, the brushless motor never will.
For the connection with the microcontroller, we will use an output pin, in our case we will use pin 8. If we use ArduPilot Mega, this pin number 8 is equivalent to channel number 5 (CH_5). We connect the white wire to the pin, the red wire, power, is free and we connect the grounds. (black wire to GND of the Arduino)
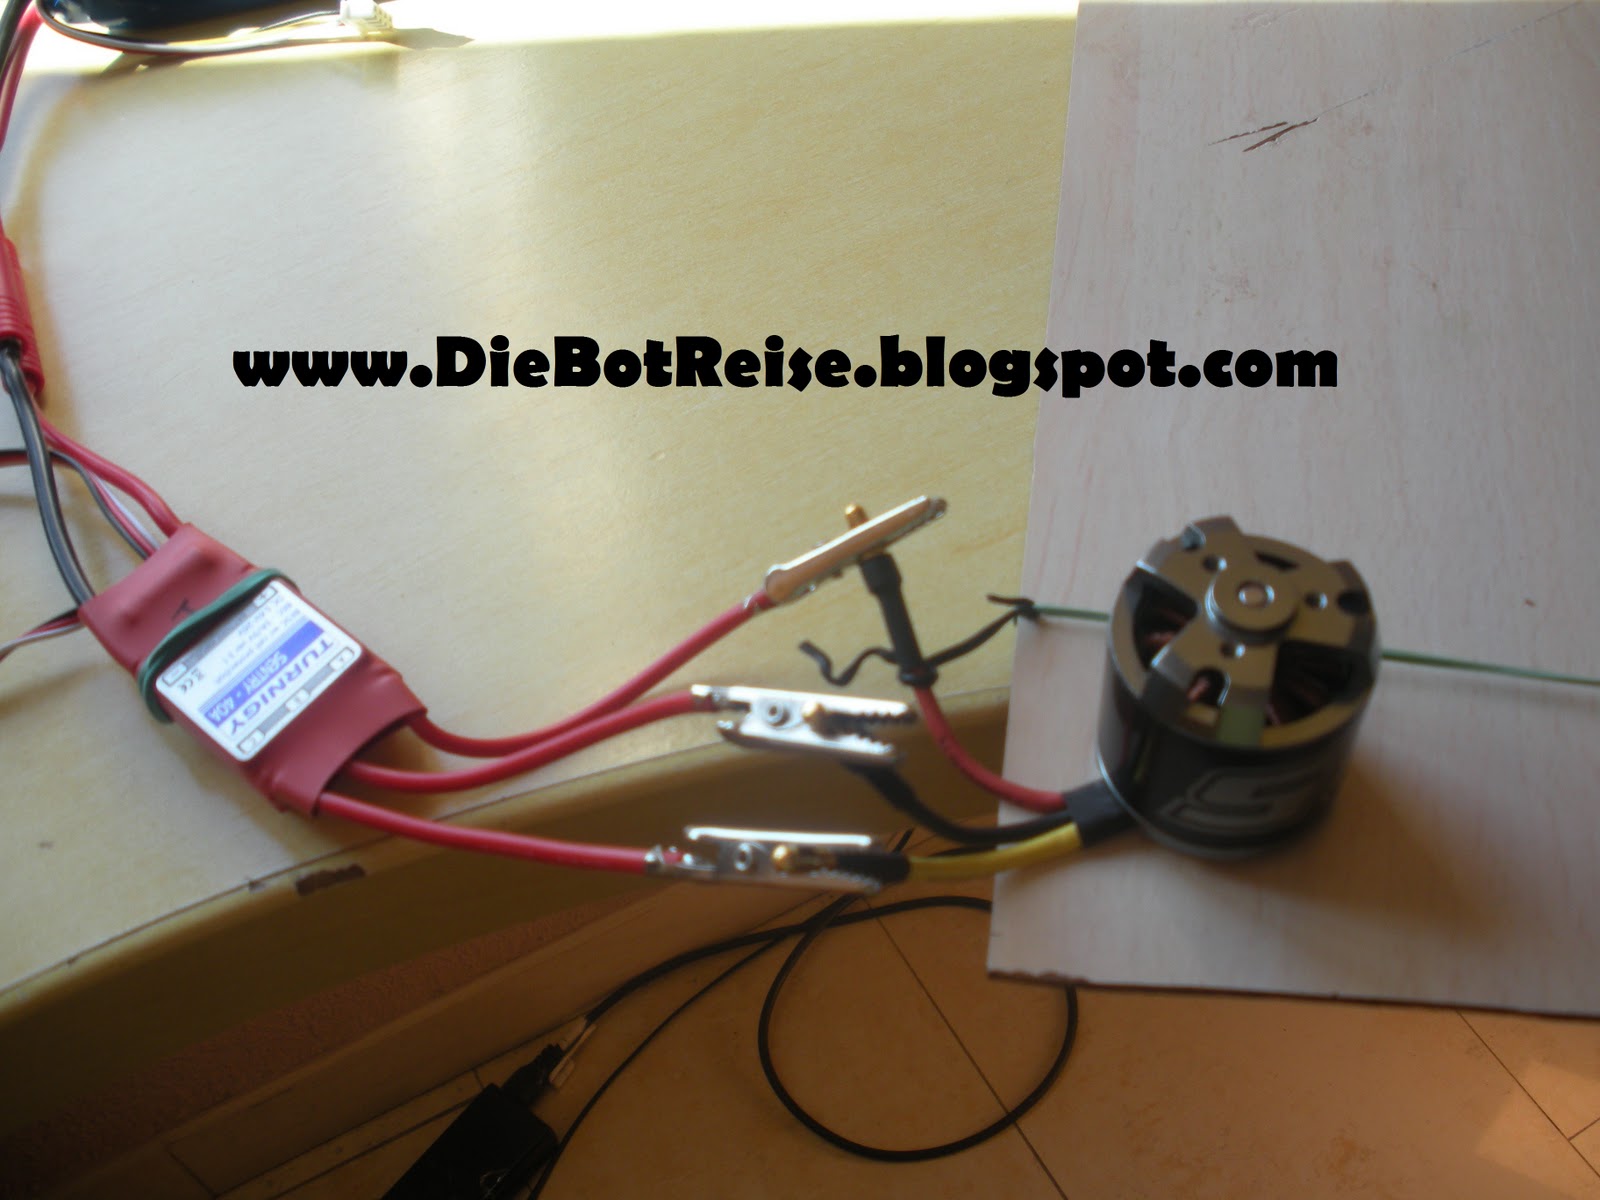
To connect the ESC, we connect the power cables to the LiPo battery by means of a 4mm banana connector (we can also use an external power supply, but we must make sure that it has the power that the engine requires… which is usually high when starting). And for the engine connections, in my case I have soldered some clamps as shown in the figure. Important to tie the engine to a fixed place, because when it starts, it can be dangerous and more if it is an outrunner engine.
Code to Program the Arduino
For the code, it’s important to arm the engine before starting it, because if we don’t, it will never start. To initialize an engine it is enough to send 0 angle signals until the engine beeps. It consists of receiving a pulse of 1 millisecond every 20 milliseconds for an approximate time of 4 or 5 seconds.
The process is:
- Supply the ESC and listen the beep music to confirm that it properly started.
myservo.write(0); // start up
- Wait for “Ready” beeps.
- start running:
myservo.write(pulsoMotor); //between 70 a 180 (max)
Anotations:
- Each motor start up with a different angle signal. For my motors it was around 65º.
- Sometimes, it does not start up if I send directly a 70º signal. But it is enoug, if I send a 30º and then 70º.
- To invert the rotating direction, you must intercambiate 2 of the 3 cables.
You can download here the full test bench Code.


Buenas Albertolg,
cre que es un poquillo tarde considerando que esto es de hace dos anios.
Me preguntaba si me podrias ayudar con algo parecido a esto, estoy haciendo un poryecto personal que tiene un "brushless motor" y 3 servos al menos, que deben ser controlados desde un ESC y un arduino, me podrias ayudar con el codigo? muchas gracias 😀
Buenas, simplemente coge fragmentos de códigos para el motor brushless y para controlar servos. Para los servos hay muchisimos ejemplos, incluso en las librerias de arduino. Mira el programa de ejemplo de aqui arriba, aunque quizá este un poco liado con lo de recivir caracteres del teclado.
1 saludo y suerte
Hello, I enjoy reading through your article post.
I wanted to write a little comment to support you.